


How to Roast a Turkey (the easy way)
A simple, fuss free way to roast a turkey that comes out juicy and beautiful with minimal work.

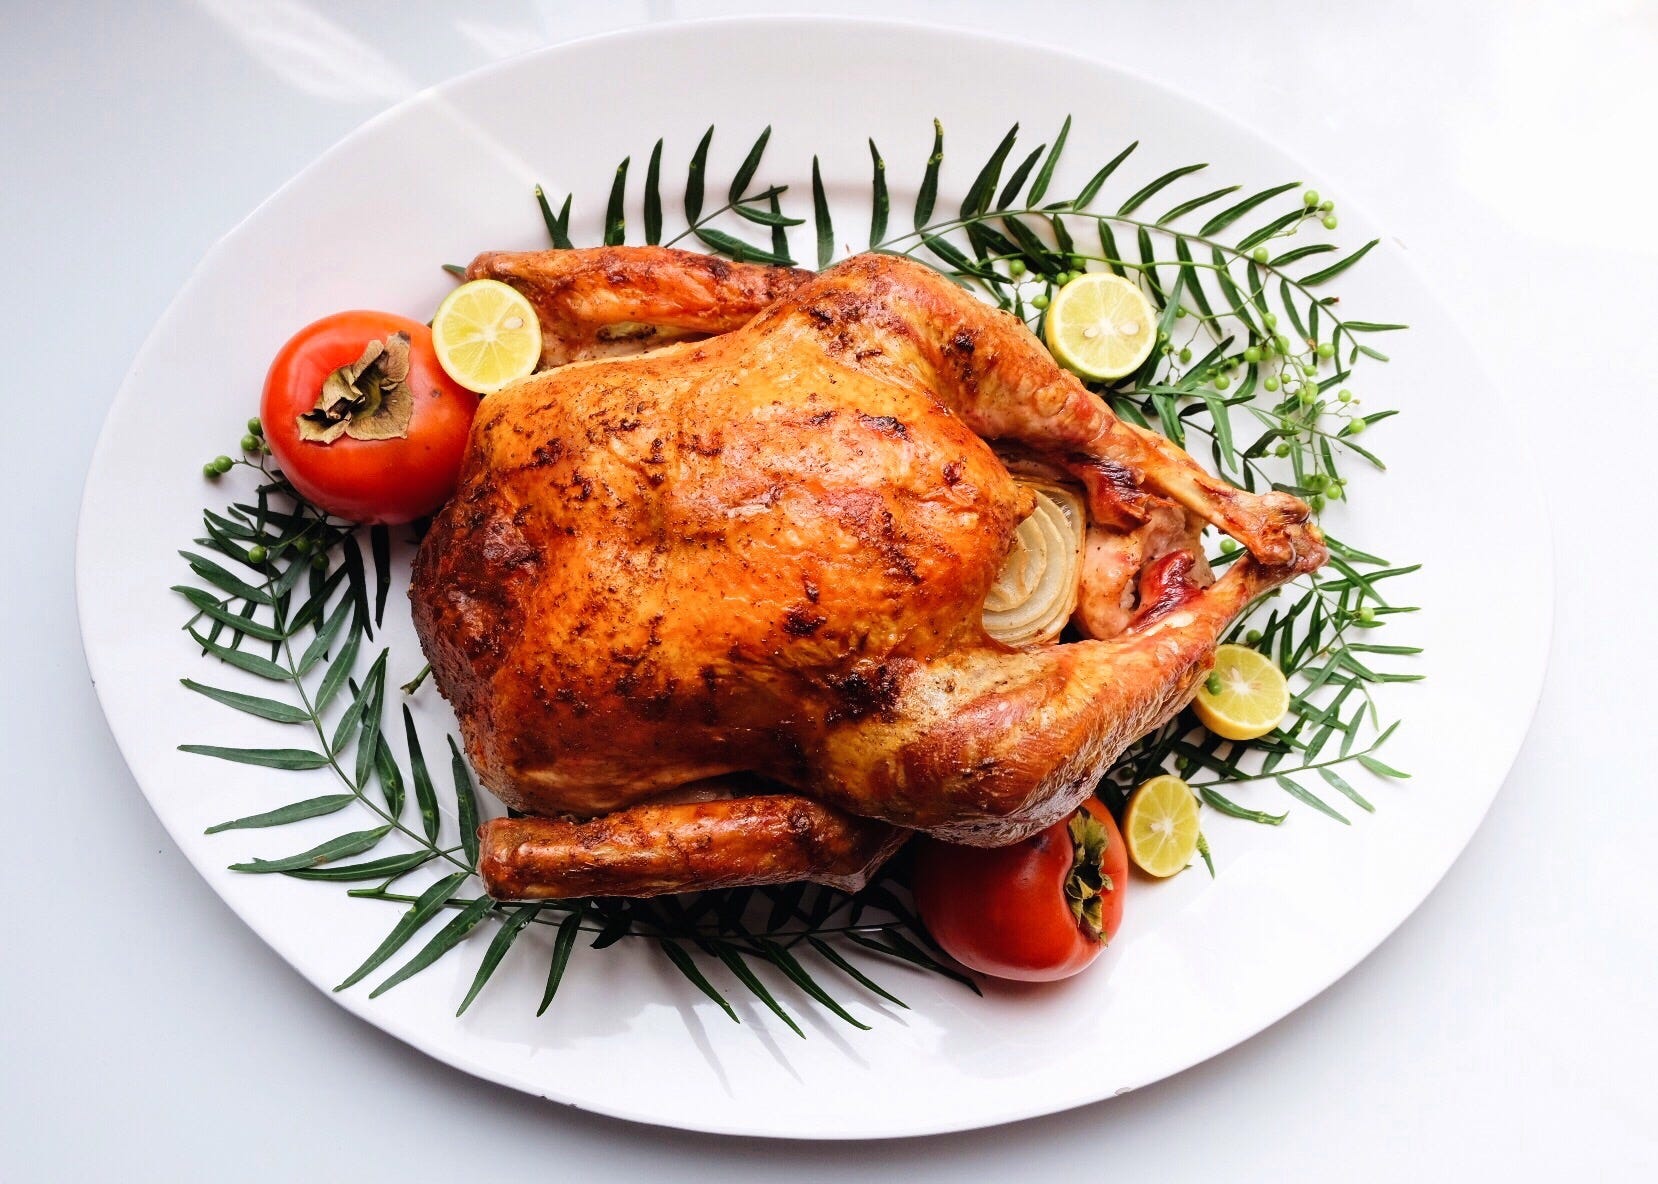
Does roasting a turkey stress you out? With so many options - brined, spatchcocked, fried, smoked, deboned, BBQ’ed… it can feel overwhelming, which is the last thing you need leading up to Thanksgiving. While we know it’s a time to give thanks and be with loved ones - it often comes with many moving pieces: travel, family dynamics (could be a doozy this year for many - best wishes to you all, remember to breathe), meal planning/prep, accommodating dietary needs, and oh yeah - cooking a mountain of food. Add to that the pressure to make everything “perfect” … no wonder we often feel overwhelmed! I keep my turkey method (and many of my side dishes - that post comes this weekend) as simple and streamlined as possible, so I can do my best to enjoy the holiday and my family and not get lost in the chaos
I start with a dry brine of salt, pepper, and dried herbs rubbed over the turkey, under the skin, and inside the bird. That sits in the fridge for 1-3 days. Then a slow and steady roast at 325F. I have a couple of little tricks (an apple in the neck to keep the breast moist, melted herb butter, and adding white wine to the pan for a great pan juice) but nothing wild or crazy. No basting, syringes, or measuring gallons of water or oil.
Choosing a Turkey:
The key to great results while keeping things simple when cooking is using the best quality ingredients you can find. An organic, free range or pasture raised bird is ideal. I buy a Deistel turkey, ordered at Whole Foods. You want something that isn’t pumped with hormones, water or saline. That being said, I know someone who swears by Butterball turkeys…. If you’re using one of those turkeys, or one that says self-basting or seasoned, don’t brine it - it’s already salted.
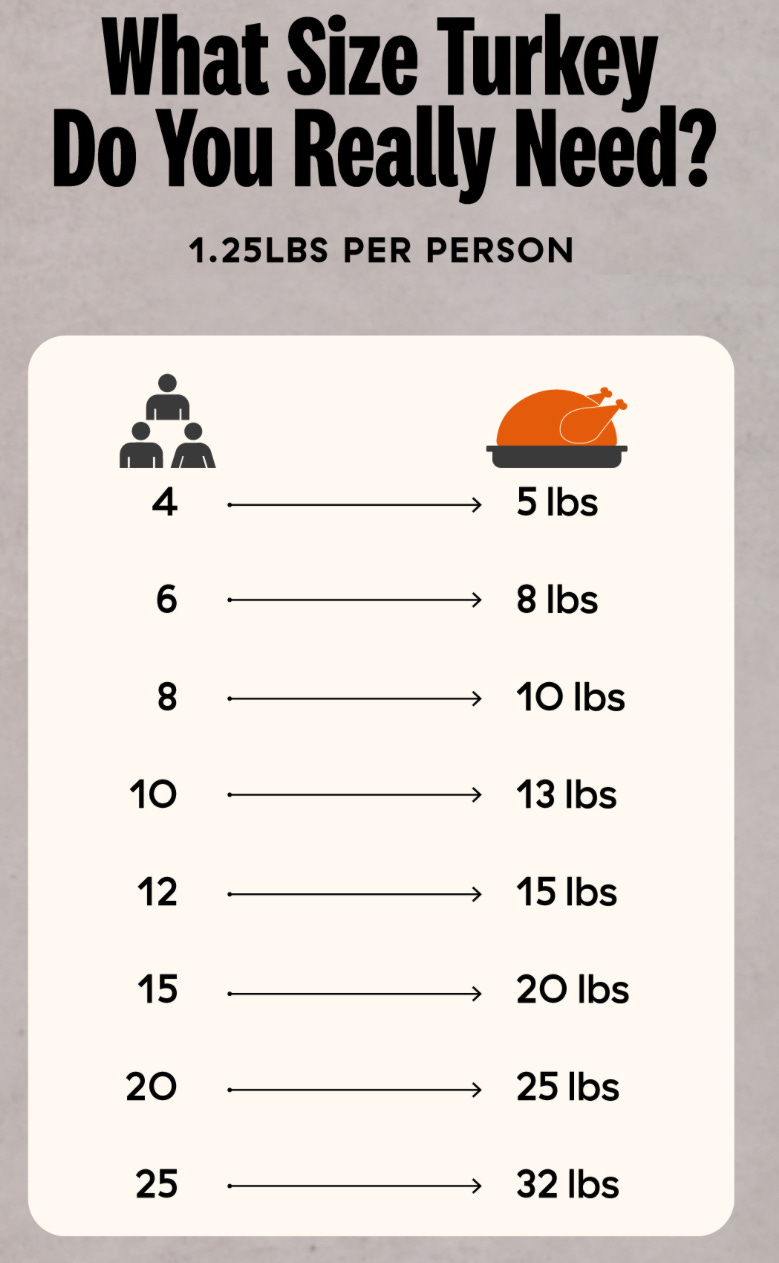
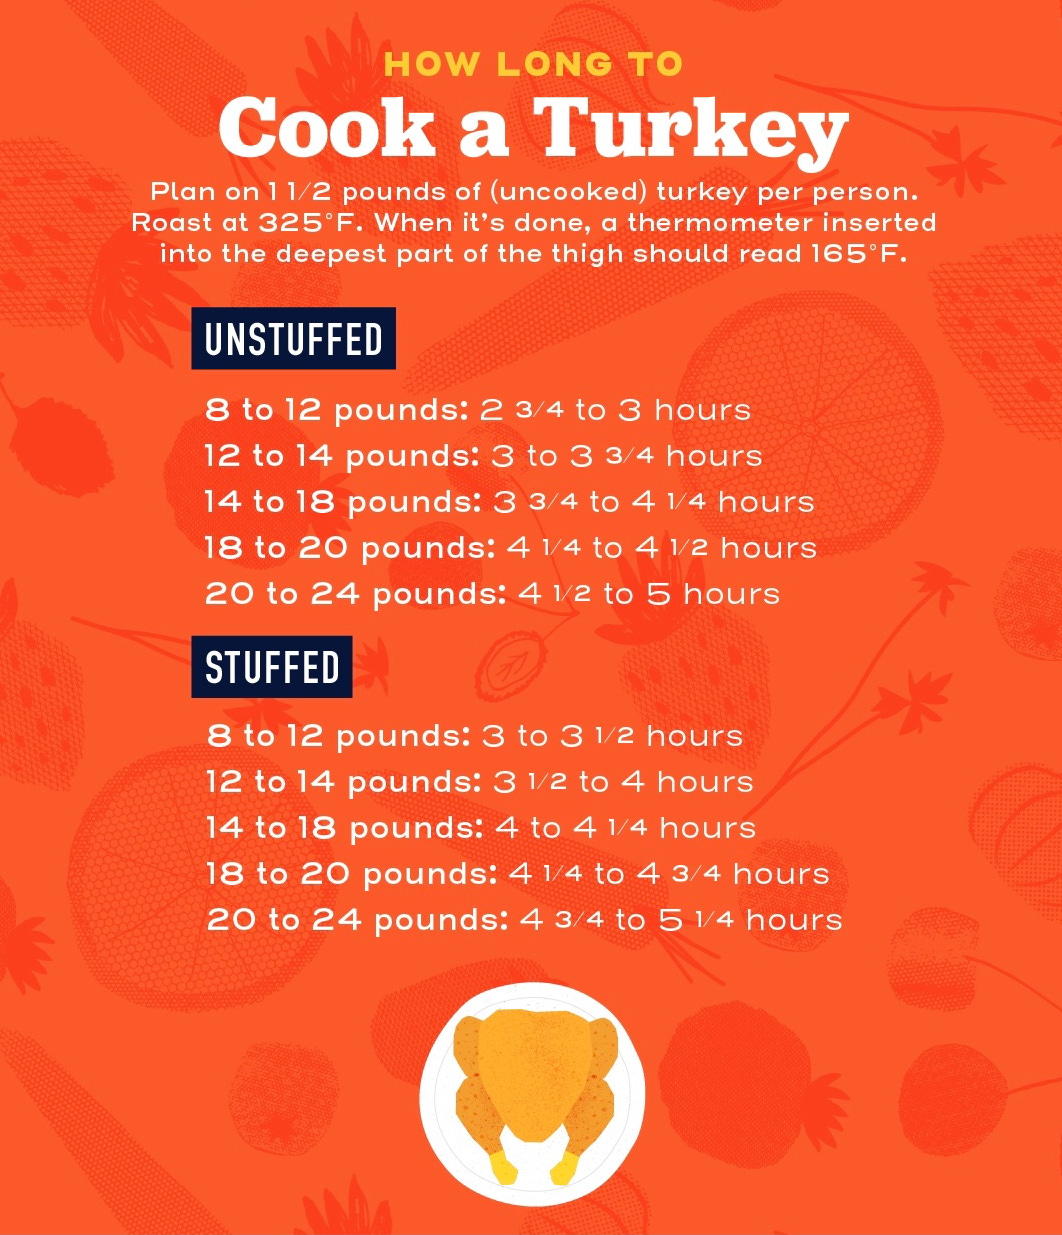
See above chart to figure out what size bird you’ll need. If you need something bigger than 25 pounds, I suggest buying two smaller turkeys. If you’re buying a frozen turkey, put it in the fridge to begin the thawing process on Sunday.
Brining - why a dry brine?
Brining is the best way to get a juicy, flavorful turkey. I love a dry brine because I’m not interested in messing around with gallons of water or giving up valuable fridge real estate. I keep it simple (big surprise) with kosher salt and dried thyme. If you feel the need for more herbs, add rosemary and sage. You can also use fresh herbs! - just double the amount.
Brine measurements:
5-7 lbs: 1.5 tablespoons kosher salt, 1 teaspoon dry herbs, 1/2 teaspoon pepper
8-10 lbs: 2 tablespoons kosher salt, 2 teaspoons dry herbs, 3/4 teaspoon pepper
14-17 lbs: 3 tablespoons kosher salt, 2 teaspoons dry herbs, 1 teaspoon pepper
18-23 lbs: 4 tablespoons kosher salt, 1 tablespoon dry herbs, 1.25 teaspoons pepper
24-28 lbs: 5 tablespoons kosher salt, 4 teaspoons dry herbs, 2 teaspoons pepper
Turkey Roasting Ingredients:
1 turkey (see above for size guide)
dry brine (see above for measurements/ingredients)
2 onions, quartered (add 2 more if you don’t have a roasting rack)
1 stalk celery, cut into 4 pieces (1 more if you don’t have a roasting rack)
2 big carrots, cut into 4 pieces
1/2 large apple
1 stick unsalted butter
1 cup white wine
2 tablespoons minced fresh herbs OR 1 tablespoon dried herbs (thyme, sage and/or rosemary)
optional aromatics for inside of turkey: fresh herb branches, whole lemon, half an onion
Instructions:
Start the dry brine Monday night or Tuesday morning. Mix the salt and herbs for the brine. You can mix them in a small bowl; put them in a mortar and pestle to crush them together; or pulse them in a blender to mix them well and break up any big chunks of herbs. Rub about 3/4 of the dry brine over the outside of the turkey. If you want brine under the skin (which I recommend), gently put your fingers under the skin by the large cavity and lift up the skin. Rub some of the brine on the breast, under the breast skin, and then sprinkle the rest in the cavity. That’s it! Now leave the turkey uncovered in the fridge on a sheet pan, or in a roasting dish. It’s going to start looking a little long in the tooth and scary after a day or two. That means the brine is doing its job. The salt pulls out the juice and moisture from the turkey, and then that juice mixes with the salt and herbs. Eventually those (now seasoned) juices reabsorb into the turkey and help break down muscle protein. The result being more flavorful, juicy and tender meat.
Thursday morning, bring the turkey to temp before cooking by taking it out of the fridge 2-3 hours before roasting. Putting an ice cold turkey in the oven will significantly increase your cooking time.
Preheat oven to 325 F. Use a large roasting pan with a rack. The pan should be big enough that there will be plenty of airflow around the turkey - this is what will make it brown evenly. If you don’t have a rack, you can roast the turkey on a bed of veggies - put 4 quartered onions and 2 cut stalks of celery in the middle of your roasting pan and lay the turkey on top.
Pat the turkey dry with paper towels. Dry skin results in a crispier bird.
Melt a stick of unsalted butter and add 2 tablespoons minced fresh herbs or 1 tablespoon dry herbs (any combo of thyme/sage/rosemary) and a few cracks of black pepper (no salt!)
Tuck half an apple into the neck cavity to protect the breast from drying out. See video below - this is an unbrined turkey so it will look different, but I wanted to show you how to insert the apple. The cut side goes against the meat, round side against the skin.
Rub the melted butter over the turkey. I use my hands to do this but you can use a pastry brush. If you want to get butter under the skin (which I recommend) you are going to have to get your fingers dirty. Gently put your fingers under the skin by the large cavity and rub butter on the breast. You can add aromatics to the cavity if you like. I like to put a whole lemon in there, half an onion, and some branches of fresh herbs.
Add 2 cups of water, the quartered onions, celery and carrot to the pan. This will add moisture and help your pan sauce along.
Roast! An unstuffed bird will take about 13 min a pound at 325. So 8-10 lbs will take about 2+ hours. See chart below 👇🏼
I keep it simple and roast at the same temp the whole time. If it gets too brown, tent it with tin foil, but I usually don’t have to.
After the turkey has been in the oven an hour, add a cup of white wine to the pan. You can baste but it’s not necessary. I do periodically check the pan to make sure there is still liquid in the bottom and nothing is burning. If the liquid on the bottom of the pan starts to disappear, add another cup or two or water. You can also throw in a little more white wine. By the end you’ll have a very flavorful jus that you can serve as your gravy (separate the fat if you want) or you can mix it into a simple roux for a traditional gravy.

I HIGHLY suggest investing in a good instant read digital thermometer. When you think you’re close, stick it in the thigh, near the bone but not touching. When you hit 155-160 F, take it out and it will continue cooking (food safe temp for poultry is 165.)
Let it rest: 20 minutes for a small turkey (5-14 lbs); and 30-45 minutes for a turkey 15 lbs and up before carving so the juices settle back into the meat and its not too hot to handle.
That’s it! Questions? Ask me below where it says comment ⬇️ or in the chat thread linked here. Yes, I always respond! I love to talk turkey (and more!) Available to paid subscribers only.
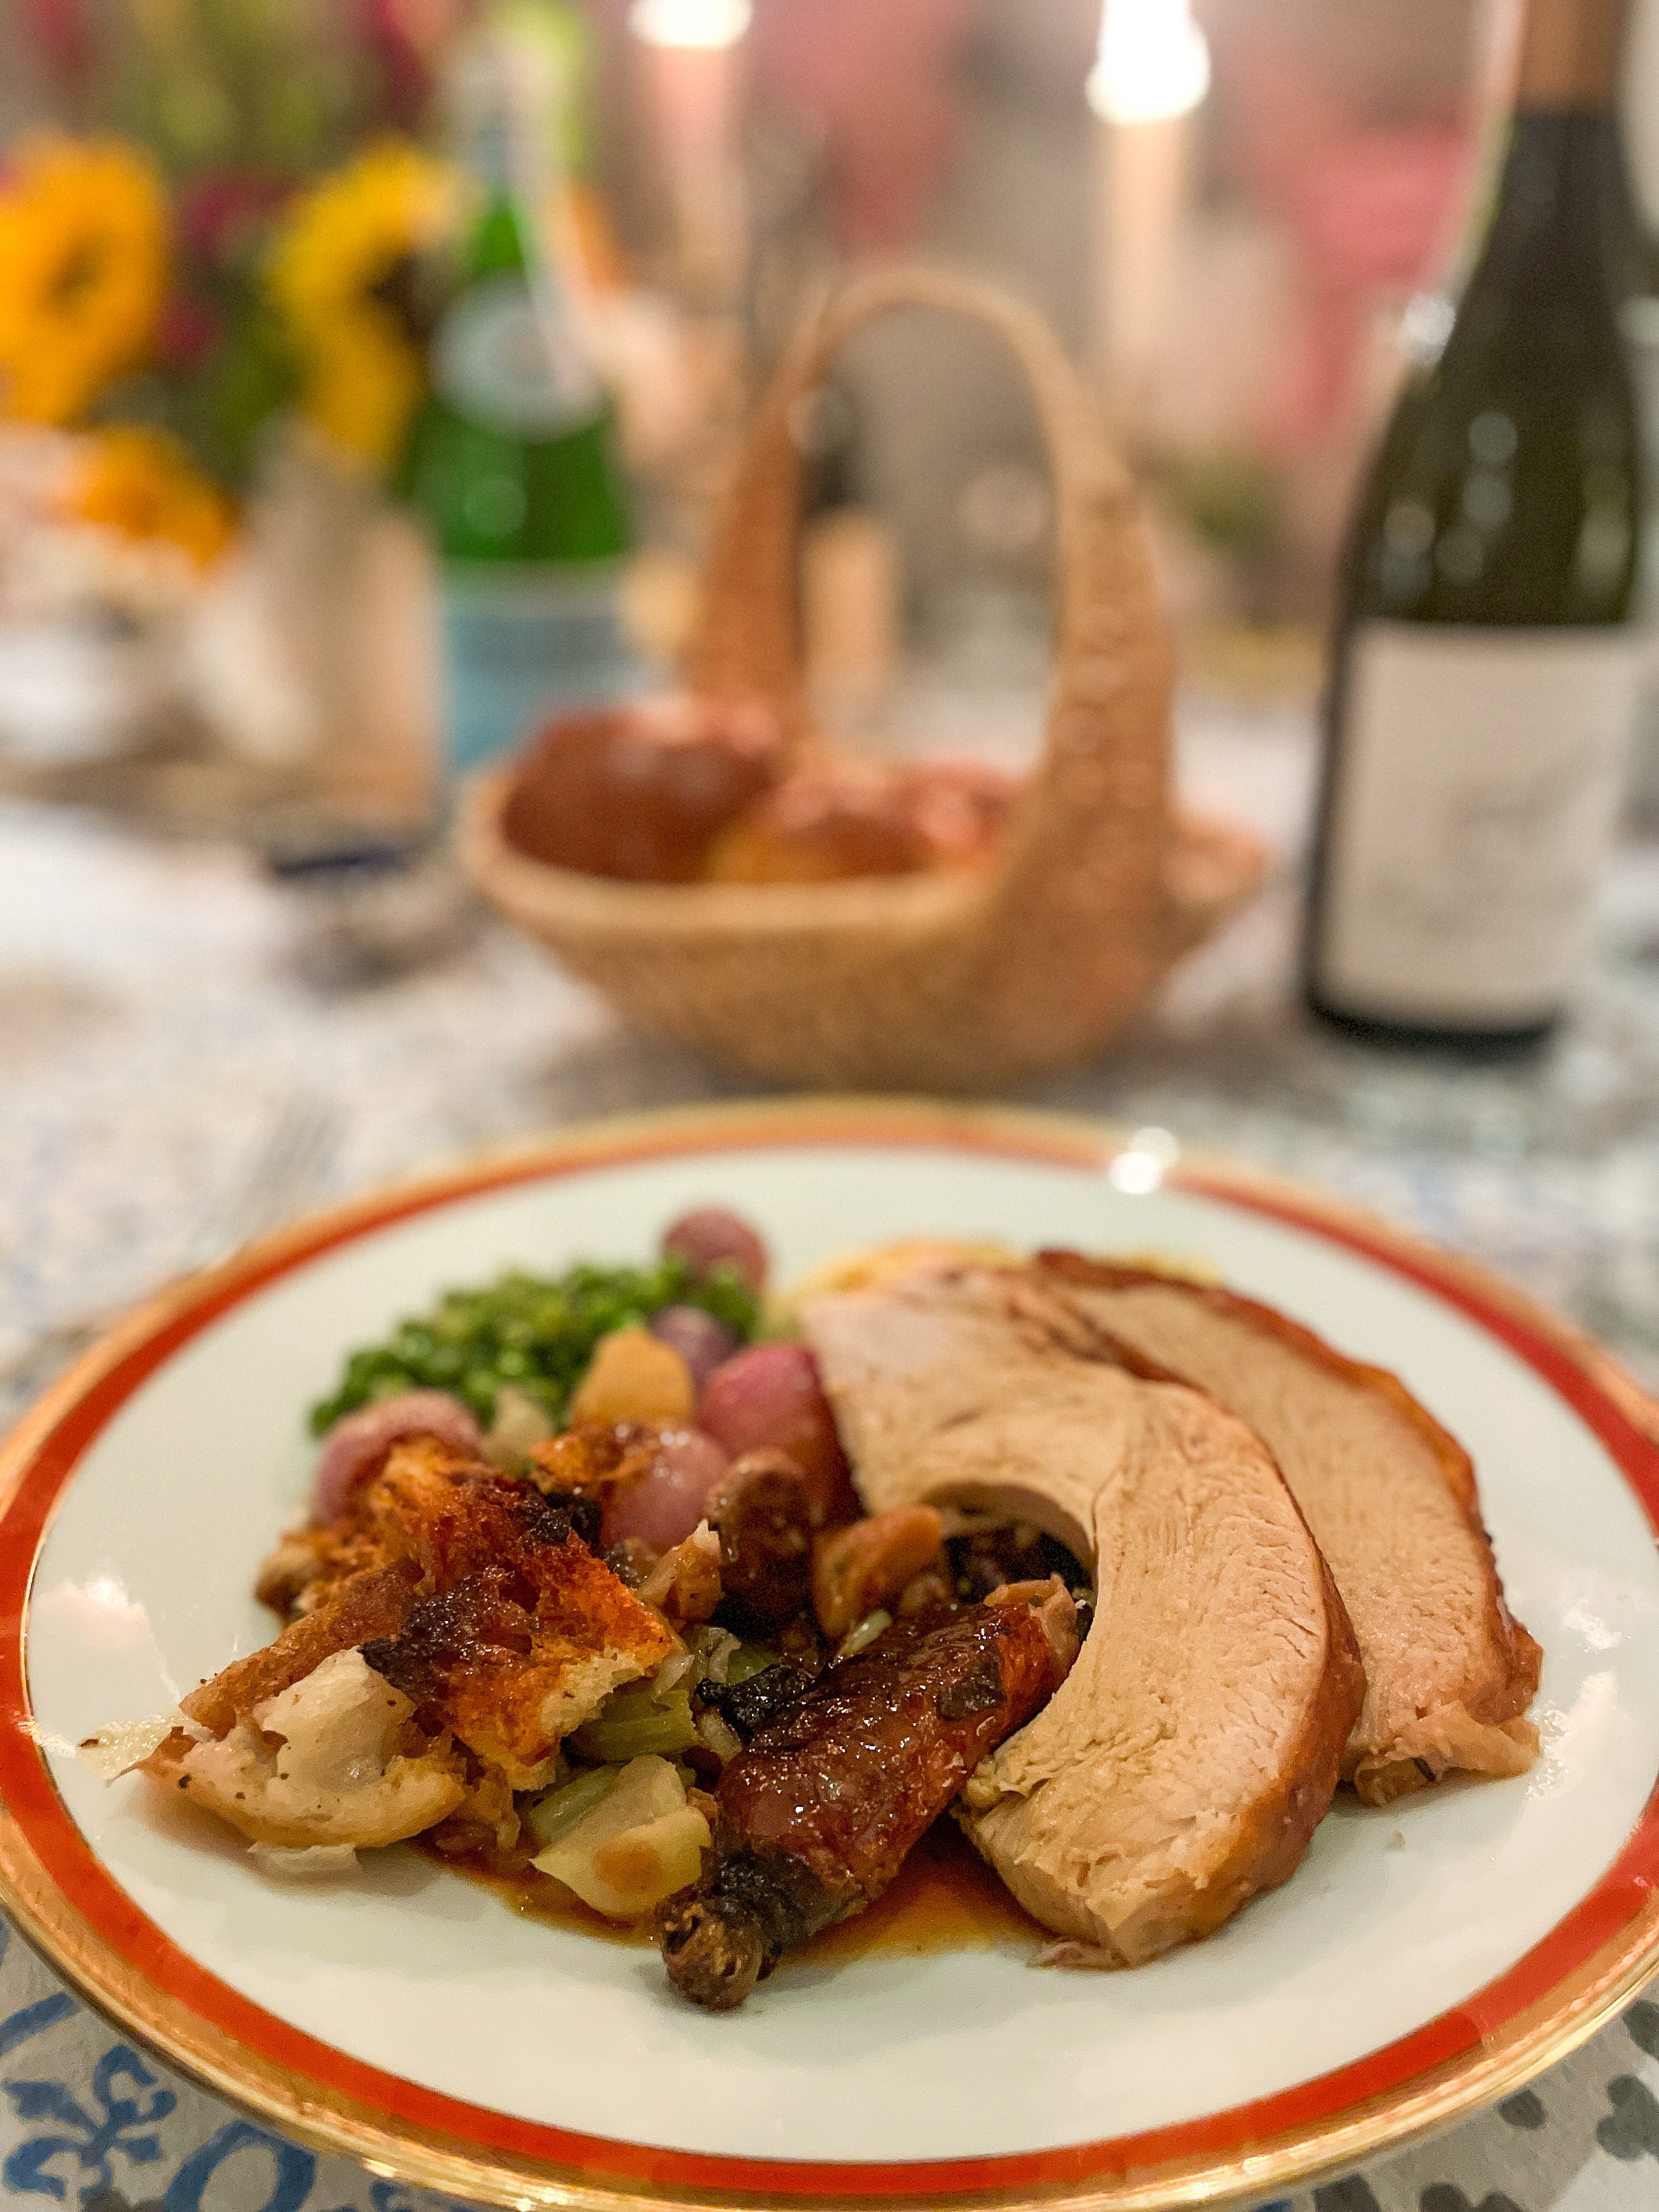
So delicious!!
Hey Emily! Making your turkey today but just wanted to clarify, in one section you say you preheat to 325 but then in the next it says 350. Which one do you recommend for a 15lb turkey?